Sunday 15 September 2019

The forgotten army 2

Hi everyone,
Sorry I haven’t been posting lately, but family and work have got in the way. However I have just got back into making some terrain for 28mm Europe, thanks to TT Combat. Just as a comparison to other brands there are some obvious differences. TT is perhaps cheaper than other brands, I have a few other brands so I think I can give an honest opinion. However there is little difference, but I don’t like how roofs are connected but a simple strip of cardboard glued over top and all the gaps are hidden.
I’ve made a base for the building, I got a bit tricky here and put magnets in the base and the floor of the building, this should help it not to move around during games and make it easier to store.
I also recommend a spray undercoat the mdf sucks up paint, this is where I’m up to.


Tuesday 23 July 2019

The forgotten army

Hi folks
Now I’m doing a terrain project called the forgotten army. Now we are not always the best at painting or modeling, but we all try to put something on the gaming table that is reasonably accurate and not silver. We all spend a lot of time researching or trying to create the perfect unbeatable army but until recently I haven’t thought about where did my army fight? And how my army fought over this terrain.
Also how enticing is it when you not only have painted miniatures to game with but also on terrain that is equal in quality, and makes sense for the period you are gaming.
I have decided to go big time COC! Early war, and I’m keen on revamping my 28mm German (I played a couple of games of BA, not my thing) and building a French army to oppose it, but I need some good looking terrain.
I’ve begun by purchasing TT combat rural bundle, it’s great value and looks right for a French town. This is before I’ve purchased any figs for the project (remember I have some Germans I did for BA).
So it begins, firstly I’ve had a major shift in how I plan a project, I know say to myself I like this period what terrain do I need? I’ll research the armies and the terrain they fought over, then I’ll buy and build the terrain I need before building the army I want. What’s good about this is many pieces can be interchangeable from period to period, so after a while I expect I need to buy very few items and I’ll have a whole ARMY of TERRAIN!
I’ve made a start, and I only got my delivery yesterday.


Tuesday 16 July 2019

Swamp Fox

Hi folks
I played a game from Swam Fox tonight, scenario 3 Blue Savannah!
I think the scenario is missing a lot of info, so I just made some of the conditions up.
Unfortunately the British lost as their reinforcements failed to arrive, I wasn’t sure of the authors intentions so assumed the reserves would come on at the start of a chapter.
There was some great moments though, with a fight in the woods, and cracking good shooting from the rifles hitting Capt Mouzon  and wounding him, leaving the mounted contingent floundering. Also the Pee Dee ranger managed to charge the rear of some fleeing backwoods men, even with tomahawks the fighting was brutal on both side, no quarter was given with both leaders wounded and effectively both units out of action. But too few against too many, a replay will see the reinforcements arrive from the first shot being fired.
Thanks to Mark my opponent.


Sunday 7 July 2019

Societial Disorder is Situation Normal for the Great Kingdoms

Am I suffering from hubris or not? Of course not, I am one of the ruling class of a Great Kingdom. So get back in your box you miserable piece of dung and leave me to my business.

The Great Kingdoms faction in Saga represents order, a strong ruling class and pretty much a desire to be left alone.  If you are out to conquer the known world, deliver rampage and mayhem then this is not the faction for you.  But if pristine ranks of beautiful equipped troops tickles your fancy then the Great Kingdom's might be the faction for you.

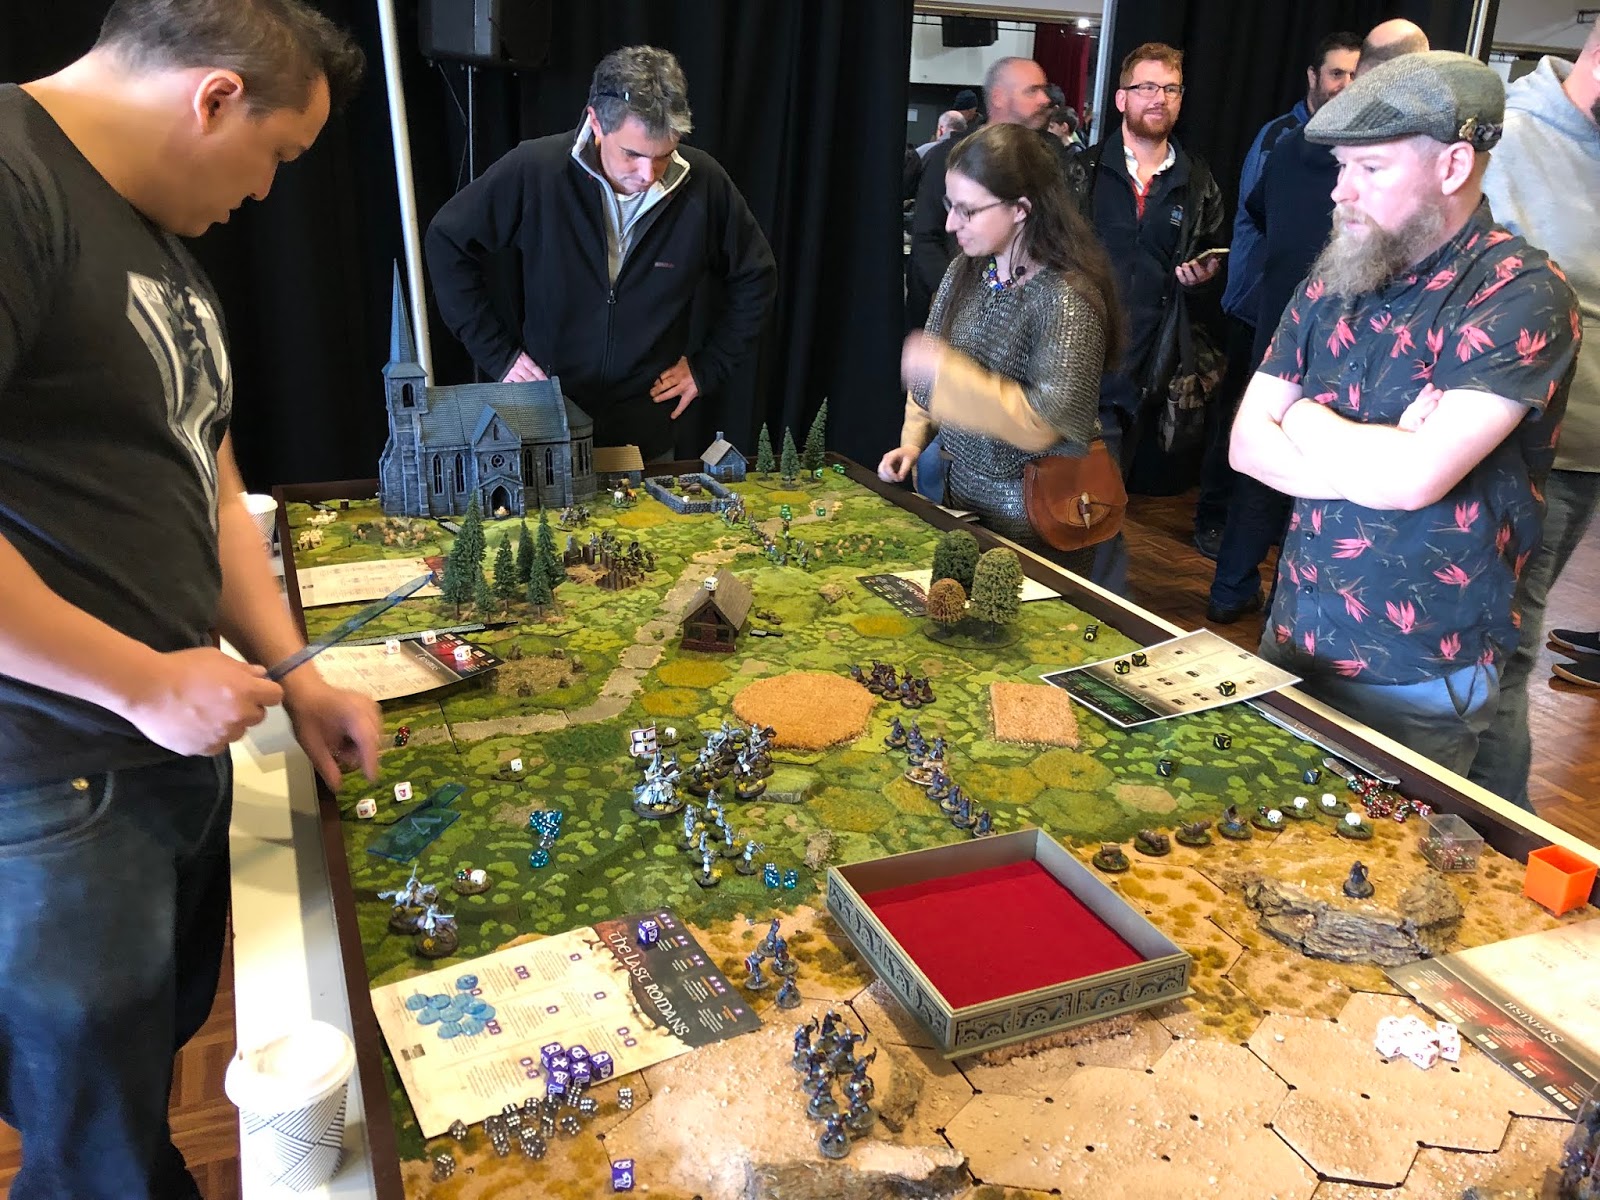
Great Kingdoms take on the Horde
My wargaming cabinet is full of Great Kingdom suitable armies from WHFB and playing ancients.  High Elves, Bretonnians, Dwarves (which we also covered with Masters of the Underneath), Caesarean and Early Imperial Romans and ancient Greeks. So my challenge is to find a few playable version of the Great Kingdoms rather than just a one size fits all list.


So what makes the Great Kingdoms faction great?

The Great Kingdoms have the Winged Mount option for all heroes and heathguard units, given then flying cavalry with the associated manoeuvre benefits counted by their inability to every hide without magic.

However being rather civilised and all that jazz, means that you only have access to a single unit of creatures (either biped or quadruped) and single monster. 

Flying Warlord, Static War Machine and other Troops
Your lieutenant options is the Captain who's special ability is to bully any heathguard, warrior or levy units into action with "we obey". Unfortunately creatures, monsters, war machines and other heroes think the captain is a self opinionated git and just ignore him.  However a captain in your warband means that you can keep one flank active whilst your warlord is off on the other.

The second special unit is the Paladin which effectively costs 1/2 a point (i.e. 2 x HG, 4 x warriors, 6 x levy or 1 creature.  You can have unto 2 paladins in your warband and have the Heroic ability. Heroic doubles the paladins aggression in melee (5 to 10) against any monsters or creatures, plus increasing its resilience from 1 to 2.  So the Paladin is primarily your monster/creature killer and therefore being mounted as normal or on a winged mount gives you are high threat range again monster creature intensive warbands, but with nothing special to offer if there are none of them around!

The Great Kingdom's sacred ground is the Memorial, which allows you to reroll one of your Saga dice in the orders phase so long as you have a unit of 8 figures or more within VS and no enemy within S.

Your sorcerers have access to Energy and Light magic which give you some interesting options to synergise with your battleboard and unit selection.

Warband Selection and how to make it both pretty and effective

I have primarily being using the Great Kingdoms for introduction games to Age of Magic with my Bretonnian miniatures. So I am 100% up front and honest when say that I haven't been looking at this list on a competitiveness first basis, but it has been fun to put on the table and play.

Warlord - Winged Mount
Lieutenant - Captain and Mount: Animal (1/2 point)
Paladin - Mount: Animal (1/2 point, so 1 full point on the Lieutenant and Paladin)
Sorcerer - Mount: Animal. (Bolt <energy>, Laying on Hands and Blinding <light>) (1 point)
6 x Heathguard - Mount Animal (1 1/2 points)
6 x Heathguard - Winged Mount (1 1/2 points)
12 x Warriors (2 points - cull 4 warriors for the war machine)
12 x Levy - Bow (1 point)
1 x War Machine - Static

Flying Heathguard down the flank
In general I see the Great Kingdoms faction as a bait, absorb and counter force.  It doesn't do shooting well enough to force your opponent to stand off.  Nor does it have the grunt and impact to charge overrun all comers.  It is definitely a combined forces warband and heavily reliant on your heroes to make it work.

The Great Kingdoms battleboard has 2 x Orders or Orders/Reactions, 3 x Melee or Shooting/Reaction s, 2 x Activations and 1 each of Melee, Activation/Reaction and Orders/Reaction. As only Legendary Hero (common+rare) and Last Defence (rare+rare) require 2 dice, it is a very easy battleboard to fill up and use with average or even less than average dice rolls.

The first principle of this warband placing defendable terrain and creating a clear field of fire for your levy and war machine.  


Levy bow have a range of L and because they have none of the hitting benefits of crossbows or firearms you want to ensure you get as many shots as you can. 12 bow levy in defensive terrain is tough to budge but also hard to ignore.  Positioning the Captain near your levy means it will always be able to shoot and maintaining a M+ gap between it and your war machine means you can use Enfilade (common) to shoot twice.  The key here is that you need to be able to shoot with both units in order to use Enfilade so you need to keep those levy within L.   The Static War Machine can target anywhere on the board it can see, so you also want to give it they best field of vision you can.  However this also means that it is generally in vulnerable position to chargers and therefore it is a must to ensure that you have it behind uneven terrain, as it means no-one can get to you without having to spend at least 1 turn within aggression 4 range.  As war machines count uneven and dangerous ground as impassable I play that you can't deploy in them either.

In addition to shooting, you can use your sorcerer's Blinding chance of cancelling an enemy units activation within L to slow down an advance and Bolt to inflict damage in addition to shooting.

The second principle is that you are going to have to draw them in and risk some pain first.


Repel the Shadows (any dice), Shield of Bravery (uncommon) and Exhortation (uncommon) are all abilities which give you defence dice. Against shooting or in melee, Repel the Shadows gives you 2 or 4 if the enemy has at least 12 attack dice with a +1 bonus if you use a Phoenix, and Shield of Bravery is a flat 3 defence dice.  Exhortation is an Orders or Orders/Reaction ability which gives all units within M of a hero 2 bonus defence dice at the cost of the hero taking 1 fatigue.  With dice on these abilities you can risk having your levy bow or warriors up in the front line as bait as 5-7 bonus defence dice dramatically increase the survival of these units.  Ideally you have your levy bow in ruins, rocky ground or even a marsh (using the fatigue your enemy will get on charging to buff your armour) and you warriors in a position to close ranks.  Your levy and potentially your war machine also have the opportunity to use Closing Fire (uncommon) which gives them a free shooting attack before melee is resolved.  

In short you want your opponent to charge your.  They probably don't want to so you shoot them instead until they do, and if they don't then you are probably doing more damage any way and keeping them out of your kingdom so it is still a win!

The third principle is to hit them when then bounce and to hit them hard.


Your captain is there to ensure you can shoot, take fatigue through Exhortation on defence and with Inspiration in attack. So you want to position him so he can be within M, but also move M+M to support the counter attack.  You don't want your captain in melee.  However your Paladin is another matter entirely and you want to ensure that he is in a position to intercept or countercharge any creatures or monsters.

Your flying heathguard and warlord are able to fly over your own troops or terrain to countercharge.  This means you can engage in melee with already fatigued and/or depleted enemy units. Your mounted heathguard don't have the same flexibility as the flying HG but should also be positioned on a flank to engage too.

Banish Evil (all) and Inspiration  (common) both add attack dice and Warcry (common or uncommon) is a great activation ability which forces the charged unit to close ranks and discard 2 attack dice every time it uses a Saga ability or fatigue.  This is great to use when you opponent has that full battleboard awaiting to crush you only to face a damn or be damned dilemma.

Final musings.

I have chosen Laying on Hands (2 dice) as the ability to remove fatigue from your heroes maybe critical during the game, especially given the fatigue generating abilities of the battleboard or the option of using Legendary Hero

This is only one way of playing Great Kingdoms, e.g. if I had more flying troops and heroes then this list could easily be tweaked into a "Flying Circus" switching out Laying on Hands for Mists as it will need increase protection from shooting.

The above list is probably the most mobile of my options, but I look forward to trying out other options.  I have so many figures to use it would be a shame not to bring them out to play.


Tuesday 4 June 2019

The Otherworld in Saga Age of Magic

Things that go bump in the night, the monsters under your bed and the night terrors that the worst of dreams are made of.

The Otherworld faction in Saga represents the creatures and beings which live outside the mortal world.  Behind the curtain of reason live the horrors of the mind, both real or imagined, the rapacious, the beguiling, insanity and torment, lust and murder and…. well, anything which just isn’t normal and not quite right.

Back in the early 2000's I played WHFB Chaos Daemons. 100% Tzeentch my army was full of horrors, flamers, screamers and associated greater daemons and princes etc… Whllst I also have some khorne, slannesh and nurgle troops, they have been sitting in the unpainted lead pile and I need to see if I have enough of them in multiples of 4 to be useful and add some additional options to this faction.  

So my challenge is to see who we can morph them into an effective warband from the Otherworld.

So what is the Otherworld like?


An Otherworld warband is a little different in that you don't have the Mount:Animal option for any unit.  instead the faction has the special rule Winged which will give any Hero, Heathguard or Warrior units Flight.  This is fluffy and interesting but gives some interesting tactical considerations which we will discuss later.  

You don't have access to levies or war machines, but you can recruit up to 3 monsters (although no titans) and 2 creatures.  This fits in with the Otherworldly theme of big nasty scary things from beyond the real world nicely.

The faction has the choice of Death and Energy spells and your Lieutenant has the Conjuror special rule which allows them to sacrifice a friendly figure within VS to take two available Sage dice, roll them, choose the best one and add it to your pool of inactive dice.  So you want to keep a warrior unit close as you can use Conjuror ability for 4 turns (without losing a unit generated Saga die) to add an addition die to you pool each orders phase with an additional chance for a Skull (Activation Pool or Portal etc..) or to give you 2 extra magic dice via Magic Pool.

You can convert unto half of your warrior units into Hunters on deployment which makes them Aggression 2 in any combat they initiate and a change distance of L for loss of the ability to close ranks and gaining Primitive. I am not sure that I have the figures to take this as an option currently

Finally the Sacred Ground for the Otherworld is the Unstable Portal.  At the end of every turn (both yours and your opponents, any unit within S will suffer a casualty on a roll of 6 on a D6. Like all pieces of sacred ground, effectively placing this terrain piece will be critical to have any chance of it occurring during the game, but it can force your opponent to clear an area, deploy where you really want them or be used to protect a unit with its 3 x S effective circle. 

Tactical thoughts, OK lets be honest, do I want to play the fluff and to hell with it discussion:

In my previous faction reviews, I have done the musing after looking at the battle board. But with Otherworld I want to consider my available models and how they may play first.

  • To go monster heavy or not? I can field 3 daemonic monsters so this an option. 3 flying or even 2 Scourges flying L and breathing M with 4 ranged attacks and defending with aggression 10 and resilience 2 is not to be sneezed at. Plus it would look really cool.  The downside is that they are monsters and I am going to need a Banner or Skull to activate each of them. on the plus side I am unlikely to try and activate them multiple times which will be good for fatigue management.
  • To go flight heavy or not? Flight gives you increased manoeuvrability and none of the fatigue issues of cavalry, but have no option of hiding behind terrain.  Given that my model selection is Tzeentch flavoured, the idea of everything but my horrors flying around the battlefield sounds really good to me, regardless of whether it is tactically smart or not.
  • Or should I do both?  Well, in for a penny in for a pound sounds like the fluffy way to do it.

Composition:

Having convinced myself that I am fluff driven first and foremost my warband composition is easy.

Warlord - Winged.  Lest just call him mounted but better and I am going to need the We Obey with all the monsters.
Lieutenant - Conjurer and Winged. Because I can (though it may not be smart) and think I am going to need that extra dice during the game for either abilities or magic boosts. (cull two HG)
Sorcerer - Winged. (Ritual <death>, Mists and Bolt <energy>) (1 point)
6 x Heathguard - Winged and there to make use of all the melee abilities (2 points)

8 x Warriors  (1 point)
2 x Flying Creatures (1 point)
2 x Flying Creatures (1 point)
1 x Scourge Monster (1 point)
1 x Scourge Monster (1 point)

What are the potential synergies with the Otherworld battle board and spells:

So now I have chosen who I am going to play, what do I need to look for on the battle board and spells. To start with, the Otherworld battle board has no shooting or shooting reaction Saga abilities instead you have four Melee, two Activation with the rest a mix of Orders and Orders/Reactions.

  • For spells I am looking for ones which are going to protect my flying troops until they get to dictate shooting and melee on their own terms.  For this I like Mists which restricts LOS until the start of my next turn.  It takes 2 magic dice with the basic ability limiting LOS to L, a Common and Uncommon reducing it to M and Ultimate Power restricting it to VS.  I really want to get the mid level effect and reduce LOS to M whenever possible, so I am going to pair it with Ritual from the Death spell deck.  Ritual's base level allows you to re-roll up to 2 magic dice on my next spell, the mid level allows me to take a fatigue and choose the facing for one die instead of rolling and the highest level means you just get to choose what want instead.  To use Ritual and Mists in the same turn I am going to have to use the Conjurer and the Magic bonus to get those additional 2 magic dice.  My final spell is Bolt as it gives me that additional ranged attack option since the Otherworld doesn't have a lot of ranged options. for 6 magic dice I can cast Bolt, then Ritual and then throw 3 dice with 2 re-rolls to hopefully get that common plus uncommon combination.
  • Portal (is one rare) is a great ability as you get to place a unit without fatigue anywhere on the table in open terrain at least M away from an enemy unit. Although you can't activate to move afterwards you can Shoot.  So you have the option to pair this with Rift (one common) and/or Abyssal Breath  (one of any dice) to deal out some ranged damage. So place my heathguard unit and get 6 shooting attacks, or move in a Scourge who gets their free Breath attack for no fatigue and can then use Abyssal Breath for an additional attack for a fatigue. Of course using portal puts your unit within M of your target and potentially a charge or shooting target.  
  • Dominant Position (one uncommon) played on this unit as an orders/reaction will prevent any unit charging it until they are within S.  Meaning that any unit that wants to get you will need to move once in order to charge and therefore enter melee with a valuable fatigue for you to play with.
  • Astral Bond (uncommon) and Flood of Power (uncommon or rare) are also great defensive spells played as Orders or Orders/Reaction. Astral Bond increases your resilience by 1, fancy attacking a resilience (3) scourge? Whereas Flood of Power increase the units army by 1 for the next melee in the turn.  
  • If by chance you have left a non monster unit vulnerable to a decisive melee charge then Doppelgängers (2 uncommon) will turn all your opponents attack dice into defence dice.
  • And finally, the any dice Supernatural Stature will give all your defence dice a +1 bonus so long as you score 3 hits (which of course your heathguard, warlord or creatures should do) and Might (common or uncommon) allows you to re-roll unto 3 attack dice with your heroes and creatures gaining an addition 3 attack dice as well.

Further tactical musings:

I have come to the realisation whilst writing this (and having played a couple of games) that I am not sure if the Otherworld fits within my playing mentality; and I am a great believer that you always play better with armies that match your personality.  So whilst I can be a comfortable with multiple personalities, the Otherworld leaves me a little dumbfounded.

  • I think you need to be aggressive given that you have no long range shooting abilities and being imposing and/or flying all round means there is nowhere to hide.  So you can't afford to sit back and bid your time against any shoot warband unless you have Mists up all the time.
  • Terrain is a tricking one as it basically doesn't do anything positive for you but can be damned nuisance.  So will be temped to place the Unstable portal early and centrally in your opponents DZ and use this to either fracture their forces, risk the chance of losing figures or refuse a flank. I also think that you want to deny your opponent of good pieces which will do you more harm than good if they have them, such as ruins and large woods.  
  • That said how you place terrain for a shooting heavy opponent is going to be totally different for a melee heavy cavalry force.
  • Hiding the 8 warriors with your Lieutenant in a wood or ruin seems like a good idea as it protects them and we recognise that they only exist to provide that extra saga die each turn.
  • 5 units with a charge range of L that ignore terrain and have the potential to shoot as well is scary.  Not as scary as the Horde may be, but still scary.
  • Board management looks really important and rolling 3 uncommon early to place on Dominant Position, Astral Bond and Flood of Power looks to be critical because you don't really have the hitting power to destroy units and the Otherworld really looks like it is going to have that punch, counterpunch, attrition feel too it.  Which I am just not sure that I am going to be up to with my warband as designed.

Warlords of Erehwon: The begins!

Hi everyone,
I haven’t had much interest in Fantasy gaming, generally as a rule I would not give it much if any time at all, rather I would delve into historical gaming gleefully. Now I’ve been reading fellow Greybeards posts on Saga fantasy, well I thought the world was coming to an end, but it didn’t and gaming went on!
So now I’ve opened my mind and joined the throng, but instead of Saga, I’m going to go with Warlords of Erehwon, just for a comparison as both sets represents similar battle size, that is a warband of 40 to 60 figures.
So now I have the rules, and have started to read them. I’m not at a point where I can give a review, stay turned though it will come!
Oh they have Samurai, very exciting!!!!
I mighty be turning to the darkness of lala gaming or maybe I’m having a wargaming midlife crisis 🤣 (40 plus years gaming).
Regards to all
Warwick

Thursday 30 May 2019

Long Tan
A battle that is right up there with the greatest of Anzac traditions! That’s why Allan and I games it yesterday using Battlefront rule Nam.

Now I really like this version from BF, there is one really great reason, Allan and I have played it for a year and we didn’t need to keep flipping through the book for rules! Thanks to BF v4 is now playable.

Enough of that back to the game, now if you don’t know the history, then I’ll ask you to buy a book, watch a documentary or read something on the internet, but basically an Australian company bumps a NVA battalion, outnumber, short on ammo, fighting in a monsoonal downpour with help a long way away. Despite the shear bloody mindedness of the Vietnamese to wipe out the Australian company, the Anzacs held on in the true spirit of the Anzac.

So the terrain was pretty simple, one half a rubber plantation, the other elephant grass as tall as a man.

We had some special rules for the scenario, but if I were to recommend to anyone else who wishes to follow my example is to let the NVA get a free born in the north to die in the south rule, that said the special rules I devised was to randomise some of the events, like the monsoon rain, supply of ammo for the Anzacs, but basically the game was scenario 4 from the Nam book, blocking force. It seemed to represent the battle nicely.

Turn1 to 5, the NVA rushes forward attempting to swamp the Anzac’s but tru to form as the NVA got close the Anzac artillery were deadly! As in real life but you can’t beat a player who consistently rolls 6’s! Most of the NVA casualties came from the artillery bombardments and they very rarely missed.

But it was slow going for the Anzac reserves to arrive but equally bad for the NVA born in the north rule. However slowly the reserve arrived in the form of two artillery batteries from the fire base at Nui Dat, even some Phantoms helped out and (unlike history) dropped some napalm 🔥 burning several 82mm rocket launches.

After this the writing was on the wall for the NVA, they had one last hope, Allen bravely removed the depleted five NVA platoons on the table and brought them back on in the final turns of the game,  he assaulted an M113 platoon and an Australian infantry platoon. The m113’s gave two platoons a very bloody nose but three platoons of NVA managed to assault the Aussie platoon destroying several stands and forcing the Australian off an objective, it almost worked the NVA were just about to pull it off, however you can’t beat a player who rolls 6’s consistently, the Australian’s I’m pinned and managed to contest the objective and the M113’s assaulted and beat several NVA platoons, this was enough for Allan to concede!

A really enjoyable game, thank you Allan, a great set of rules and a fantastic period to study!

Oh, one tip for Nam, use sabot bases for the NVA force, you can thank me now 😁.


Thursday 23 May 2019

IJN Hei Minesweeper

Hi everyone,
I received a commission to paint up this nice Warlord cruel seas ship, love the game and the models too but I’ve recently sent an email to my local group here in sunny Toowoomba and received some minor criticism on my latest project, a Japanese Hei class minesweeper. Now initially I used Tania spray (IJN grey) for the base coat, it’s very dark so I did highlights but I didn’t want to go overboard (sea what I did there 😂)! Anyhow a fellow Greybeard suggested that it would probably turn into a rust bucket very quickly, so I came back to the model and thinned some red paint with a brown wash and this is the result.
I hope you all like it and I hope it’s owner is pleased with my work.


Sunday 19 May 2019

Lets go look for the Wild Things.... or Max gets sent to bed without any supper!

Time for a rumpus with the Lords of the Wild

This is a faction close to my heart.  I played Wood Elves but in my WHFB days and also have a large and tattered collection of Beastmen. I even have enough Minotaurs to run the Black Hills legendary warband list.  However this list just screams for me to pull out my old Wood Elves and thankfully I have a broad enough range of models to fill most of the options this list provides.  

At first glance the Lords of the Wild looks shooting friendly, but I see it as ranged unit friendly.  This is because most of the battle board abilities support ranged units in melee too. 

The Lords of the Wild warband has access to lots of shooting, with Bow (foot) or Composite Bows (mounted) across Hero, Heathguard and Warrior troops and javelins for your levy.  You also have access to the full range of Monsters (0-2 of) and Creatures.  No War Machines but they they live in forrests to what is the point ;-).

The factions sorcerers have access to Earth and Light magic. Both are very useful depending on whether you are choosing to be Monster/Creature heavy or light.  Given that Lords of the Wild battle board has no orders or orders/reaction abilities which support Monsters, spells are the only way to help them out during the game.  

Irrespective of whether you choose a shooting, monster/creature or mixed list, the Lords of the Wild is going to be your ambush, snipe and whittle down the foe before delivering the final blow type of play style.

The Lords of the Wild special rules

  • Your Lieutenant has Ranger which means treats all uneven terrain as open.  Plus, and this is the real benefit, all other units in the warband get to treat any uneven terrain the Ranger is in as open too.  The Ranger also has the option to be armed with a Bow.
  • The Swarm is a levy upgrade which makes one unit Tiny, Insignificant and Primitive.  This means the unit always counts as being in light cover against shooting, doesn't reduce its move through uneven or dangerous terrain and won't inflict fatigue on units if wiped out within S.  The swarm is therefore going to work well as a fatigue inflicting speed bump in front of your units.
  • The sacred ground, is a Primitive Totem which inflicts fatigue at the end of your activation phase (but before the end of your turn) on every enemy unit within VS so long as you have a saga dice generating unit also within VS. Given that sacred ground is always a small, high impassible piece of terrain this gives the Primitive Totem one of the smaller areas of effect, but can still be really useful if placed correctly.

What to look for on the battle board and spells:

  • Sharpened Arrows (one rare) is a fantastic ability that will be used whenever possible.  Getting 2-4 automatic hits means almost certain death to any exhausted Heroes, Creature or Monster units. Its also nasty against heavily armoured units or those in cover.  It can also combine with Ambush (one uncommon) and Fury (Common or Rare) to delivery this alpha shooting strike at distance with a unit of warriors or levy.
  • A mounted sorcerer with Verdant Wakening (any two magic dice) automatically gives you a piece of small uneven terrain as the source of Ambush fire. This gives you a shooting threat range of L+S+S+L with bows and L+S+S+M for Javelins or composite bows. So basically almost any where on the board can be targeted this way.  
  • Retreat (Uncommon or Rare) will then allow you to run your sorcerer away if threatened in the following turn, because after using Verdant Wakening you will already be within S of some terrain.  Or if you used the magic bonus to get the 2 extra magic dice, you could use Banishment (Light) to move your threat away out of charge range in your turn.
  • Wall of Thorns (Earth) works well with the battle boards abilities as it provides Solid Cover to a unit within L of the sorcerer, which is a blessing for your ranged weapon units.  A unit of bow warriors in light cover will save on 4s and if combined with Sacred Dance (common or uncommon) will gain 3 defence dice too. All the other melee abilities can be activated on commons too, so Call of the Wild, Fury, Point Blank Range (all one common at a minimum) or Poisoned Blades (two common) come into play.  This means your warriors with bow have not only an excellent change of surviving melee, but they can also deal out a lot of attacks too.
  • Finally you will have to have a spare Titan figure lying around for Rise of the Spirits (Common plus Rare, during orders) which enables you to replace a small unoccupied piece of uneven terrain within M of one of your unit with this Titan. To really make this work you will need a common, uncommon (for activation to move/charge) and a rare, but it is going to make your opponent think about where they put uneven terrain on the board and unit placement too.

Tactical musings:

  • I am sorely temped to take a very heavily shooting based warband as it has the ability to hit at range, snipe, hide in terrain and shoot and scoot depending on the units.
  • Placing woods and fields in your opponents half of the table is a priority, likewise placing ruins and rocky ground in yours if possible.  Whilst high terrain blocks line of site, this is less of an issue for the Lords of the Wild compared to other shooting lists.  Because of the fragile nature of your ranged troops you want them in terrain wherever possible to give them cover and also reduce the opportunity for melee troops to charge quickly and without gaining fatigue.
  • The ranger offers tactical manoeuvrability for mounted heathguard or warriors with composite bows. Move L into uneven terrain containing the Ranger with no fatigue, shoot for free and then decide whether to withdraw or not.  With terrain S apart it is possible for the Ranger to move between terrain pieces to allow this to happen a couple of times.
  • As much as I like Chrysalis (Earth) as a spell, with one sorcerer my go to spells will be Wall of Thorns, Verdant Wakening and Banishment. All three support the hitting a range, delay the advance and support defence in melee tactics my Lords of the Wild warband will favour.  

Composition:

Like all my Age of Magic lists, my composition is heavily influenced by the figures I already have and which I have traditionally thought cool.

Warlord - I can take any of the options but am leaning toward Bow or Mount: Animal Composite Bow options.  I like the Mount: Beast (Flight) but feel I am going to need the We Obey ability too often
Lieutenant - Bow (cull 2 HG)
Sorcerer - Mount: Animal (Wall of Thorns, Verdant Wakening and Banishment) (1 point)
6 x Heathguard - Mount: Animal Composite Bow (2 points)
12 x Warriors - Bow (1 1/2 point)
2 x Biped Creatures (1 point)

Wednesday 15 May 2019

Looking at Masters of the Underneath

Basic overview of Master of the Underneath

Masters of the Underneath are supposed to represent the miners, the underground hordes, things that hide, things that delve and make arcane machines etc...  Well maybe they do and maybe they don't but this is one of the options my Dwarves will be taking.

The Master of the Underneath (MoU for short) like heavy weapons (Warlord, Heathguard and Warrior options) as well as warriors having access to Firearms.  You can have a flying war machine or two, and a Scourge (for that dragon or golden horde worshiping firewrym) but otherwise no other flying.  Only your Heathguard can be Mount: Animal and your Warlord can Mount: Beast.

The Master of the Underneath's special rules includes


  • Alchemist - a grenade throwing lieutenant
  • Destruction Team - a single model warrior with 3 firearm shots and a chance to blow up
  • Underground Network - two M by M pieces of low impassable terrain that enable you to manoeuvre your units through one to the other.  Not only does this give you the opportunity to deploy you units into your enemies rear, by placing 2 pieces of terrain as one you 

The battle board and spells 


The MoU battle board is interesting and subtle.  You have 3 Orders/Reaction abilities which force your opponent to take higher risks to engage your units. Tenacity on a common gives one of your units 3 defence die in melee or shooting for a -1 penalty to attack dice rolls.  Traps and Chasm are rare or double rare and are very good if you can get them off.  Use Traps on the unit your opponent has setup to do all the damage. They need to roll their melee armour or higher on a D6 for every activation and if they don't must either cancel the activation or suffer a fatigue. Large Heathguard units, Warlords and Titans are going to hate this.  Chasm is not going to be used often but when it is the results could be devastating.  If your opponent is all lined up closely and doesn't have many movement activations then this is going to spread a lot of casualties around.  So having it on your board is great way to prevent them preparing for that alpha strike with all their abilities and magic up.  The only away to avoid the effects of Chasm is to move outside of S and this requires activations.

Aside from Experimental Techniques which is shooting, the rest of saga abilities are melee and fairly defensively oriented.  Remove fatigue, get solid cover, move out of range etc...  Don't expect the MoU units to charge in deal out lots of attack dice and smoke units in melee.  However if you use your shooting right, deal out fatigue and then charge in you are likely to be decisive.  Order of Battle (two common dice) is a great ability as it potential allows you to activate 4 units to charge if your units are all within of the first unit you activate with this ability. Or, you can activate to shoot with firearms, deal out fatigue and then charge in with your flanking units into melee.

MoU magic comes from Time and Metal spells.  My current choice are Slowed Time (Time), Decay (Time) and Rites of Battle (Metal). These spells support they way I expect to play the MoU.  Slowed Time supports your shooting, move your firearm equipped warriors, mobile warmachine, or Destruction Team to within M and fire without fatigue. Decay forces unto 3 enemy units within L to roll a die and potentially take a fatigue, casualty or both for each unit. And, Rites of Battle is one of my favourites as it gives all your units within M (basic) or L (common+uncommon) a bonus 2 attack dice in each melee for your turn and next.

Tactical musings


Your lieutenant (Alchemist), Destruction Teams (0-2) and Firearms Warriors are the things that make your shooty stuff different.  Between M and L, firearms are just like bows, but within M they are crossbows which impart fatigue on they target if it suffers a casualty.  Normally this isn't a big deal, but with Resilience Heroes, Creatures and Monsters out these this is really good. Cause 1 casualty to get 2 fatigue, with a good round of shooting likely to exhaust Resilience (1) units and leave Resilience (2) units on 3 fatigue. If you have a Static Warmachine in LOS of any exhausted Resilience unit, then you are likely to be waving it goodbye.

The nature of the battle board suggests that you want to pick you time to charge and hold of your opponent until you have sniped away and got them fatigued.  If you can break up a concerted attack and force them to charge piecemeal then your defensive abilities should see you in good stead.  you can afford to keep one firearms unit up to shoot at M and then use Tactical Withdrawal to move fatigue free back out of range.

Placement of terrain is interesting, especially your Underground Network.  I am going to be sorely tempted by the opportunity to place them side by side (S away) dead centre of the front of my deployment zone and place my war machines behind them.  The Order of Battle ability means that you will be rewarded by keeping your melee units close by.  A couple flanking a shooting unit provide both defensive and attacking options as the battle progresses.

Composition:


My collection of Dwarves don't have any creature or monster suitable options at present.  So I won't be taking them for the time being.

Warlord
Lieutenant - Alchemist (cull 4 warriors)
Sorcerer - (Slowed Time, Decay and Rites of Battle) (1 point)
1 x Destruction Teams (cull 2 warriors)
4 x Heathguard (1 point)
4 x Heathguard (1 point)
12 x Warriors - Heavy Weapons (2 points)
9 x Warriors - Firearms (2 point)
9 x Warriors - Firearms (2 point)
1 x Warmachine (cull 4 warriors)


Monday 13 May 2019

Some thoughts about The Horde

Saga Age of Magic is now out in Australia and a few people have been asking about the different factions and how they play.

So this is my first attempt at a faction review and/or play guide.  I hope you find it interesting.

The Horde, what are they like?

The Horde is the faction most associated with the idea of barbarian warbands, the mass of unruly blood crazed warriors and races such as orcs and goblins. Regardless of the miniatures you choose and your flavour of fantasy I see them as the charge and bash faction.

The warband is combat driven, with regular heavy weapons or mounts being the core options and you shooting limited to levy bow, mounted composite bow warriors, Scourge monster, a single war machine and javelins on war chariots.

The Horde battle board only has one shooting ability, but since everything else is mostly movement and melee based, you are going to want to build a melee oriented warband.

The Horde's sorcerers have access to Earth and Metal magic, which buff the Horde battle board and troop types really well.  With right spell selection and the full battle board, the Horde are very fast, hit hard and can deal out a lot of damage very quickly.  The have some defensive abilities which reduce the likelihood of taking casualties in return, but overall you can expect that unless you can significantly reduce your opponents Saga dice generation abilities early, there counter attacks are going to hurt.

The Horde's special rules include

  • a lieutenant upgraded to a aggression 6 Champion with Pride.
  • War Chariot heroes which hit hard with javelins and have double aggression if starting melee with no fatigue.
  • and, a Sacrificial Stone as their Sacred Ground which imparts a bonus attack die to all Horde units within S in melee.

Battle board and spell synergies:

  • for a rare dice, For the Horde (Orders) increases your charges over open terrain by S and your fatigue can't be used against you.  This means you can camp outside of shooting or cavalry charge ranges with mounted units or outside of the foot unit charge range and initiate charges from far away.  This makes me want to take lots of mounted units and quadruped creatures.  Combined with the metal spell Stoke Fury, you now have a mounted unit capable of charging L+S+S or a monster charging M+S+S.  This is potentially brutal.
  • Me First (Orders) stacks well with either of the above to give you 4 bonus attack dice, if your first activation for the turn is a charge.  Play this on your Behemoth and it enters melee with 16 dice.
  • Domain of Metal spells are particularly useful for the Horde as they give bonus dice when calculating your initial attack dice pool.  So you get to max out your monster in combat despite not being allowed to use advanced saga abilities and your other units can use Rage and Prayers to the Old Gods to their best effect.
  • Let the Blood Run gives you two charge activations for the price of one so long as you have no more than one fatigue.  With For the Horde up this gives you the opportunity to charge in and then use Let the Blood Run to finish off small units etc...

Tactical thoughts:

  • Having played a handful of games with the Horde, I like the fact that they are fast, really fast if you let them.  I think you need to be patient and wait the right time to unleash their charges.  If you get that rare sage dice early, I think you need to place it on For the Horde as it is only to screw with your opponents mind early on.  You can fill your battle board over a couple of turns knowing that if your opponent wants to stand off you can use manoeuvre to close to just outside of L.  If you get a second rare, placement on Activation Pool means that you are guaranteed two extra saga dice on your charge turn to ensure you have all the activations you need.
  • If you take only one sorcerer then my spell choice is Chrysalis (Earth), Stoke Fury and Rites of Battle (both Metal).  Chrysalis is so you can re-roll one magic die per spell cast, which gives you two chances to get the +2 bonus attack dice on Stoke Fury and range L with Rites of Battle. On the turn you charge you want to have both of these off if possible and you need Rites of Battle up to give you extra hitting power during your opponents counter attack.
  • Placing the Sacrificial Stone early and in your opponents deployment zone sounds like a good idea as clearly indicates to your opponent that you are coming to get them.  Uneven terrain is your enemy, so you also want to place these out of the way and limit the amount of terrain on the board as early as possible.
  • To mount of not to mount.  Given that your strike range can be L+S, I think that it is feasible to have an all mounted melee warband. A mounted sorcerer enables you to maximise the Rites of Battle bubble and ensure you get Stoke Fury on the right unit.

Composition:


Disclaimer, I am playing Age of Magic so I can bring out all my old fantasy armies. Given the size of my collection I can pretty much take any combination units I want and I have so far.  But based on my games so far this is what I will be taking next.


Warlord - Mount: Animal
Lieutenant- Mount: Animal (cull 2 HG)
War Chariot (1 point)
Sorcerer - Mount: Animal (Chrysalis, Stoke Fury and Rites of Battle) (1 point)
6 x Heathguard - Mount: Animal (2 points)
2 x Quadruped Creatures (1 point)
8 x Warriors - Mount: Animal or with Composite Bow (1 point) 
1 x Behemoth Monster (1 point)

Sunday 12 May 2019

Saga @ Little Wars Melbourne - Wrap Up


Little Wars Melbourne for 2019 is done and dusted


Great day for Saga in Melbourne and massive thanks to Pip, Robbie, Kat, Ben and Tony for helping out with all the demo games, setup, pack up and just being a great bunch of people to hang out with.

The table and display

We were allocated 12'x5' and needed every inch of it. The table base lives on top of my pool table at home so needed my tailer to bring it to the hall.  Everything was packed in tubs and the team had lots of fun laying the hex tiles out.  All the key terrain pieces are made according to Saga terrain dimensions and 4" hex system always means you keep them S away from each other.  The only down side is that you need to fit them in the frame so you can't move them that 1" more.  But that is a small price to pay.  The MDF hex tiles are made by Mike @ Battlefield Accessories and I flocked them up. We also added some extras for a little eye candy including a 3D printed cathedral that Robbie had made which is amazing.


The miniature display stands were supplied Viv @ Knights of Dice, who not only made them up especially for us, was putting together the last one right as we were setting up.


Demo games

In order to give people a feel for playing Saga with it key mechanics, we made 3 point / 4 Saga dice warbands.  Vikings v Anglo Danes and  Crusaders v Mutatawwi'a were the go to lists though we had Spanish, Moors and a couple of others in reserve.  Using 3 points allowed for 2-3 quick turns which more than adequately demonstrated the key phases, activate units and the battleboards.

Kat, Robbie and Pip were the demo masters in chief with Kat playing non-stop from 10AM to 3PM.  For most of the time we had 2 games going at the same time and early on we had 3.  I stopped counting when we hit 20 demo games, so I think we got around 30 with lots more people looking on.


Saga miniature display


We had over 200 miniatures on display plus some terrain samples from Ainsty Castings and Renedra.
  
Unfortunately the V&V shipment didn't arrive in time, but we got 

Magister MilitumNewline DesignsOld Glory UKShieldwall MiniaturesSHQ MiniaturesSteve Barber ModelsStronghold TerrainWargames FoundryWarhansaWarlord Games and West Wind

The display probably got more attention than the demo games and I was constantly answering questions about the companies, playing and collecting Saga armies and discussing long lost piles of metal which people thought about bring out of boxes and onto the the table.


There were lots of complements on the display and surprise at the number of companies making 28mm Saga suitable miniatures. The most common comments were:

  • the miniatures look so much better in the flesh and that some company's websites just didn't do their figures justice
  • whilst there was some difference in scale most people were comfortable with the idea of mixing and matching ranges
  • lots of people took close up photos and the copies of the contact details for further research.


Day in review

It was a great day out in general. Lots of demo games, with some really great terrain and armies on display throughout the hall. It was also great to see that my club, the Nunawading Wargaming Association was incredibly well represented and the talent and commitment displayed was amazing.


From a Saga perspective we hit all the goals; lots of games were played; lots of new gamers and those who owned th game but never played it were uncovered; and we created lots of interest. Melbourne is a big city in area so it is easy for people to live 1-1½ hours from each other, so it was great to be able to direct people to gamers and gaming clubs local to them.  I don't know exactly how many people attended Little Wars, but we had a couple of hundred drop by our stand.


Looks like we will be doing the same thing at PAX in October 2019 and working towards a Melbourne Saga tournament later in the year too.

Thursday 9 May 2019

Battle for Pelisium Moor

Great Kingdoms v Horde Battle Report

using

Menoth (Privateer Press) and Warriors of Chaos (Games Workshop)


A cold wind swept over Pelisium Moor, dispersing the mists into cobweb like clouds across the fields.        The discordant sound of jangling armour broke the morning's silence, disturbing the water foal into the air and small animals to seek shelter.

As the sun's ray burnt away the last of the morning mist, the two warbands could clearly seen facing off across the wet and marshy moor.  Ready for battle.

The Great Kingdoms warband consisted of:
  • Warlord on foot
  • Captain on foot.  This is the Great Kingdom's lieutenant which has We Obey as its special rule
  • Paladin on foot
  • Sorcerer on foot 
  • 2 points of heathguard on foot with heavy weapons (1 point turned into the captain and paladin)
  • 1 point of biped creatures
  • 2 points of warriors on foot
  • 2 points of levy, 1 with firearms and 1 with bows.
The Horde warband consisted of:
  • Mounted warlord
  • Mounted lieutenant
  • Mounted sorcerer
  • War Chariot. Horde special hero unit
  • 2 points of mounted heathguard (6 figures after 2 replaced for the lieutenant)
  • 3 points of warriors (in 2 units of 12)
  • 1 point of behemoth monster
Book of Battles - Battle of Heroes set in Marshy Country, with Refused Flank and Unknown Length.

We mucked up the setup and deployment reading the refused flank rules after setting up so the terrain was concentrated along the Southern long edge, leaving the North sparsely covered.  We also forgot that placing Sacred Ground is part of regular terrain deployment and left it for last.  So The horde entering from the East decided it needed to play the game in the Great Kingdom's deployment zone and hence the 2 sacred ground pieces were in the North West.

Turn 1

The Horde place half is warband North of the woods and then the rest South after the Great Kingdom deployed.  The aim was to sweep in around the southern flank.  With a 6 Saga dice to start, the horde was able to fill up the battle board including a rare on "For the Horde" and maneuvered up to just outside of L of all the Great Kingdom units aside from the level bow, which moved its warriors to within charge range.

The Great Kingdoms moved filled its board, moved the firearm levy forward and shot it and the bow at separate warrior units using "Enfilade" causing 1 casualty to each unit.  


Turn 2

Using Magic support "Stoke Fury" (on a rare), "Strengthen" and "Me First" Saga Ability; the Horde's warriors charged the levy bow in the swamp, killing 7 with 1 units; and then charged the levy firearms with the other killing 10. 

The Great Kingdoms then counter struck the northern warriors, first with its creatures who ended up exhausted without inflicting any damage.  Then their warriors charged winning combat and charging again, wiping out the Horde's warriors and distributing fatigue to the warlord, sorcerer and behemoth. 


Turn 3

The Horde repositioned its units for charging in its next turn.

The Great Kingdom sorcerer seeing how his enemy controlled the power of his magic (just) decided to risk the "Abuse of Power" to remove all the fatigue from his creatures unit only to roll double 1 and disappear in load smelly puff of smoke.  


Turn 4

The Horde trigger's "For the Horde" and with a combination of "Let the Blood Run", "Violence" and "Stoke Fury" charge the southern Great Kingdom units.  The levy bow were wiped out, but the warriors survived the war chariot's charge and only lost 4 (not enough to lose a Saga dice).

Seeing his enemy isolated and fatigued the Great Kingdom's paladin charged the behemoth kit and the warlord ordered his creatures into horde's warlord and destroying it too. 

Turn 5

With only 2 Saga dice left the Horde charged the war chariot back into the Kingdom's warriors only to die a horrible death and the lieutenant charged the captain only to end in an exhausted draw.

Ahead on points and will all its units within charge range exhausted, the Great Kingdom's warlord orders his units to rest awaiting the killing blow to land in turn 6.

Turn 6

The horde rolls a 3 on a D6 roll and the game ends.

Key Takeaways:

  1. Read the scenarios first before setting up. This is not a mistake we normally make, but in the excitement of getting an 8 point game in, both of us forgot.  Knowing the the Refused Flank deployment in advance would have changed the game.  The Great Kingdom's wood would have been centre field, the hordes one in a corner and its Sacred Ground at the edge of the Great Kingdoms deployment zone.  Once the Great Kingdom's Sacred Ground was placed, the horde would have called time and there would have been less terrain. Maybe?
  2. The horde is aggressive and there were times when it should have really pushed harder.  Its deployment was all wrong and should have just left the bows in the swamp and dealt with the rest of the army.  
  3. Remember that War Chariots have Javelins and their +1 bonus in melee on the charge.
  4. Fatigue management is critical. Even with resilience 2, you need to not only know when to spend your opponent's fatigue, you also need to weigh the risk of taking fatigue from that extra activation. Each point of fatigue is one closer to death and all it takes is a un/lucky roll or two and poof!
  5. It was a great game which seesawed multiple times and 1 or 2 dice rolls made the difference.
  6. Still have lots to learn about the synergy between units and the battleboards.  There is going to be a lot of fun learning the intricacies of Saga:Age of Magic.

Sunday 5 May 2019

Little Wars Melbourne Preparations

Saga Suitable Miniature Display

As part of the Saga Demonstration and Participation table at Little Wars Melbourne we will be displaying Saga suitable miniatures from:
  1. 1st Corps
  2. Aventine Miniatures 
  3. Bad Squiddo Games
  4. Conquest Games
  5. Crusader Miniatures
  6. Drabant
  7. Eureka Miniatures
  8. Fireforge Games
  9. Footsore Miniatures
  10. Gorgon Studios
  11. Gripping Beast
  12. Magister Militum
  13. Newline Designs
  14. Old Glory UK
  15. Shieldwall Miniatures
  16. SHQ Miniatures
  17. Steve Barber Models
  18. Stronghold Terrain
  19. V&V Miniatures (hopefully, still checking the post office daily)
  20. Wargames Foundry
  21. Warhansa
  22. Warlord Games
  23. West Wind
In addition to I have some terrain and accessories from:
  1. Ainsty Castings
  2. Battlefield Accessories
  3. Knights of Dice
  4. Renedra
The purpose of this display is to enable you all to see the quality of sculpts, casting, scale and style of different companies before committing a a sight unseen purchase online. 

All the companies above have kindly donated examples of their ranges covering Age of Invasions, Age of Vikings and Age of Crusades periods.  I have had the opportunity to meet and talk to many of owners of these companies.  All of them are extremely passionate about wargaming, making miniatures and it is truly fantastic that they have all been able to pursue their passion and receive an income from it at the same time.

Work in progress and there are still more to go.  Resin, plastic and different types of white metal as well.
I have been chipping away at the miniatures every evening, driving my family made as it has taken over half the kitchen table.  Still got quite a few to go but everyone who stops by our Little Wars stand will get to see at least 200 miniatures.  If I have enough time, bases and space left, I might get to include some Age of Magic Undead miniatures too.